Since last year we were working on a new main page for the Phoscon App. A dashboard like main page. I want to introduce to you the new dashboard and invite you to test it if you want before we release it in one of the next deCONZ beta versions and in one of the next Android/iOS app releases.
We call the the new dashboard “Phoscon Home” and the goal is to give the user more information and capabilities to control their smart home. But we also want to keep it as simple as possible for every user to set up their devices in the new dashboard.
So now we have rooms in the app that represents the rooms in your home. You can simply add lights, smart plugs, sensors, thermostats and blinds to your rooms. You can have a quick look at the sensor values and control your lights, thermostats and blinds from the front page without the need to go to various sub pages.
We only changed the main page of the old Phoscon App. So the other pages like scenes editor, switch editor, automations, etc. are still there and are still needed to create scenes, schedules, automations and so on…
Lets have a closer look at the new dashboard:
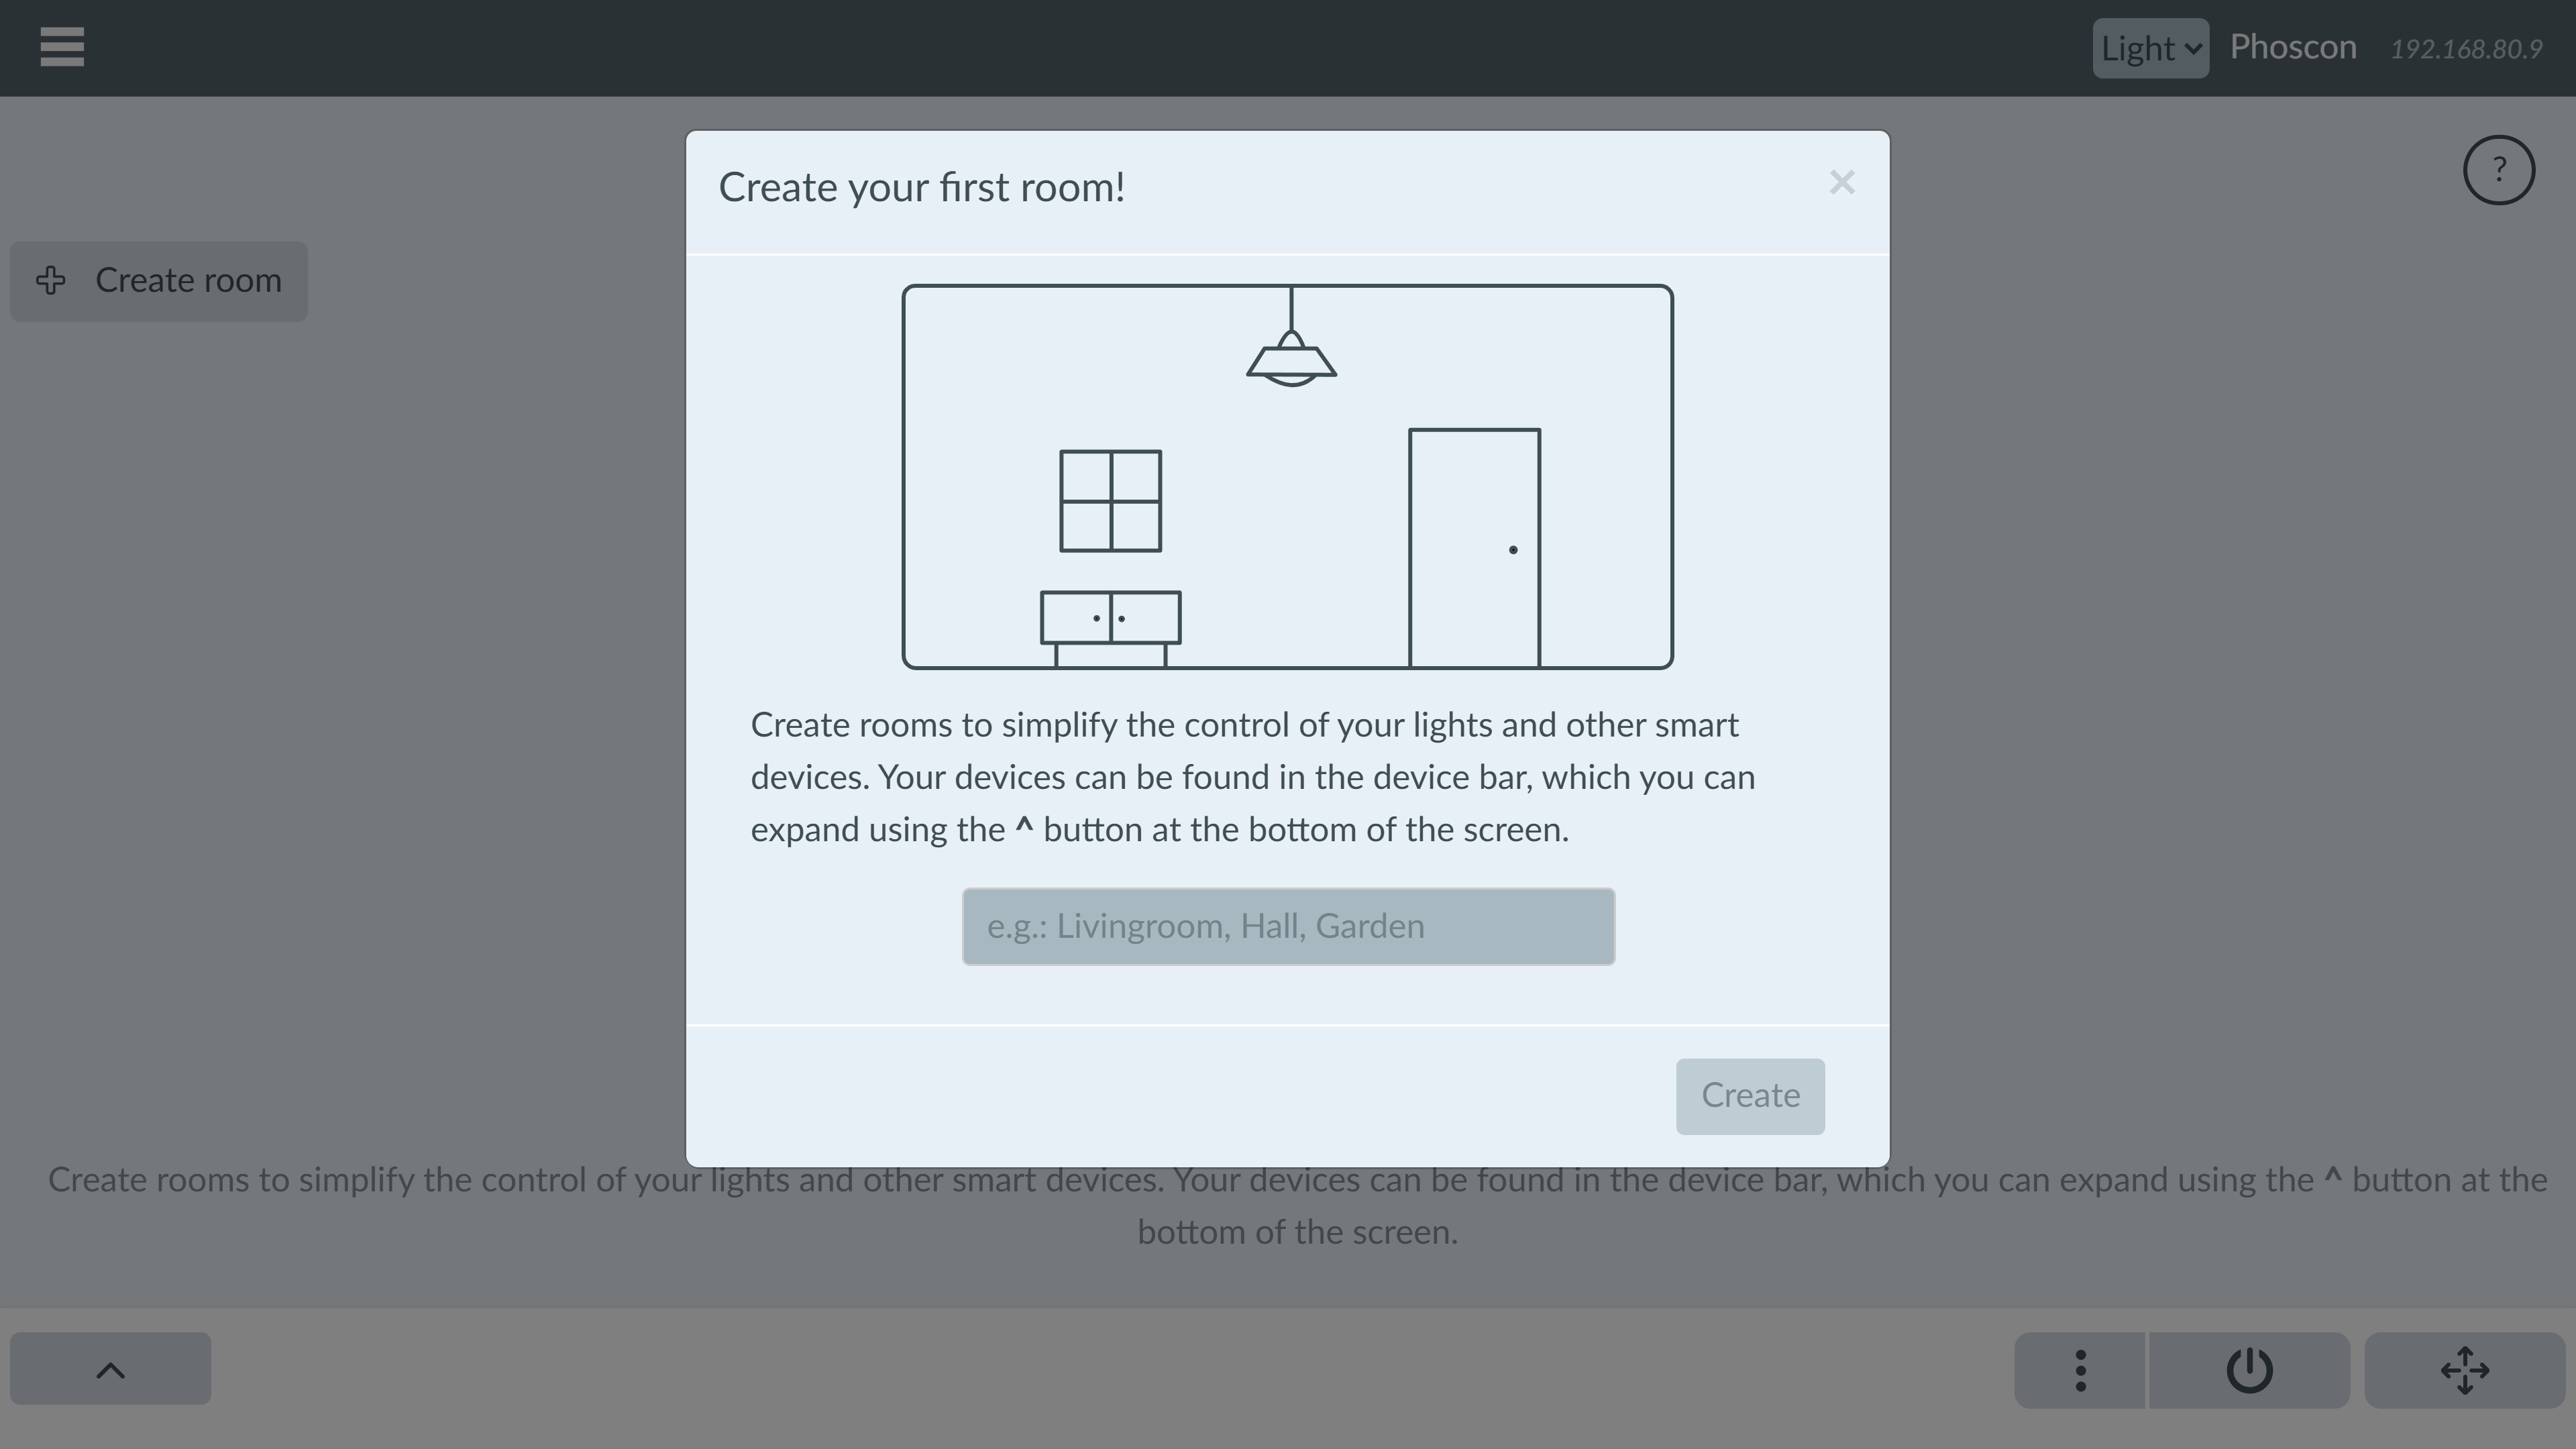
When you start with a fresh deCONZ installation and did not have an old Phoscon App installed you will be prompted to create a new room.
However most people will have an existing setup of deCONZ with the Phoscon App. Then you will not see your old groups at the dashboard. Instead you will be greeted by a message that suggests you to use the “migration assistant” to convert you old groups to to rooms in the new dashboard. The button to start the assistant is at the top of the screen next to the “create room” button.
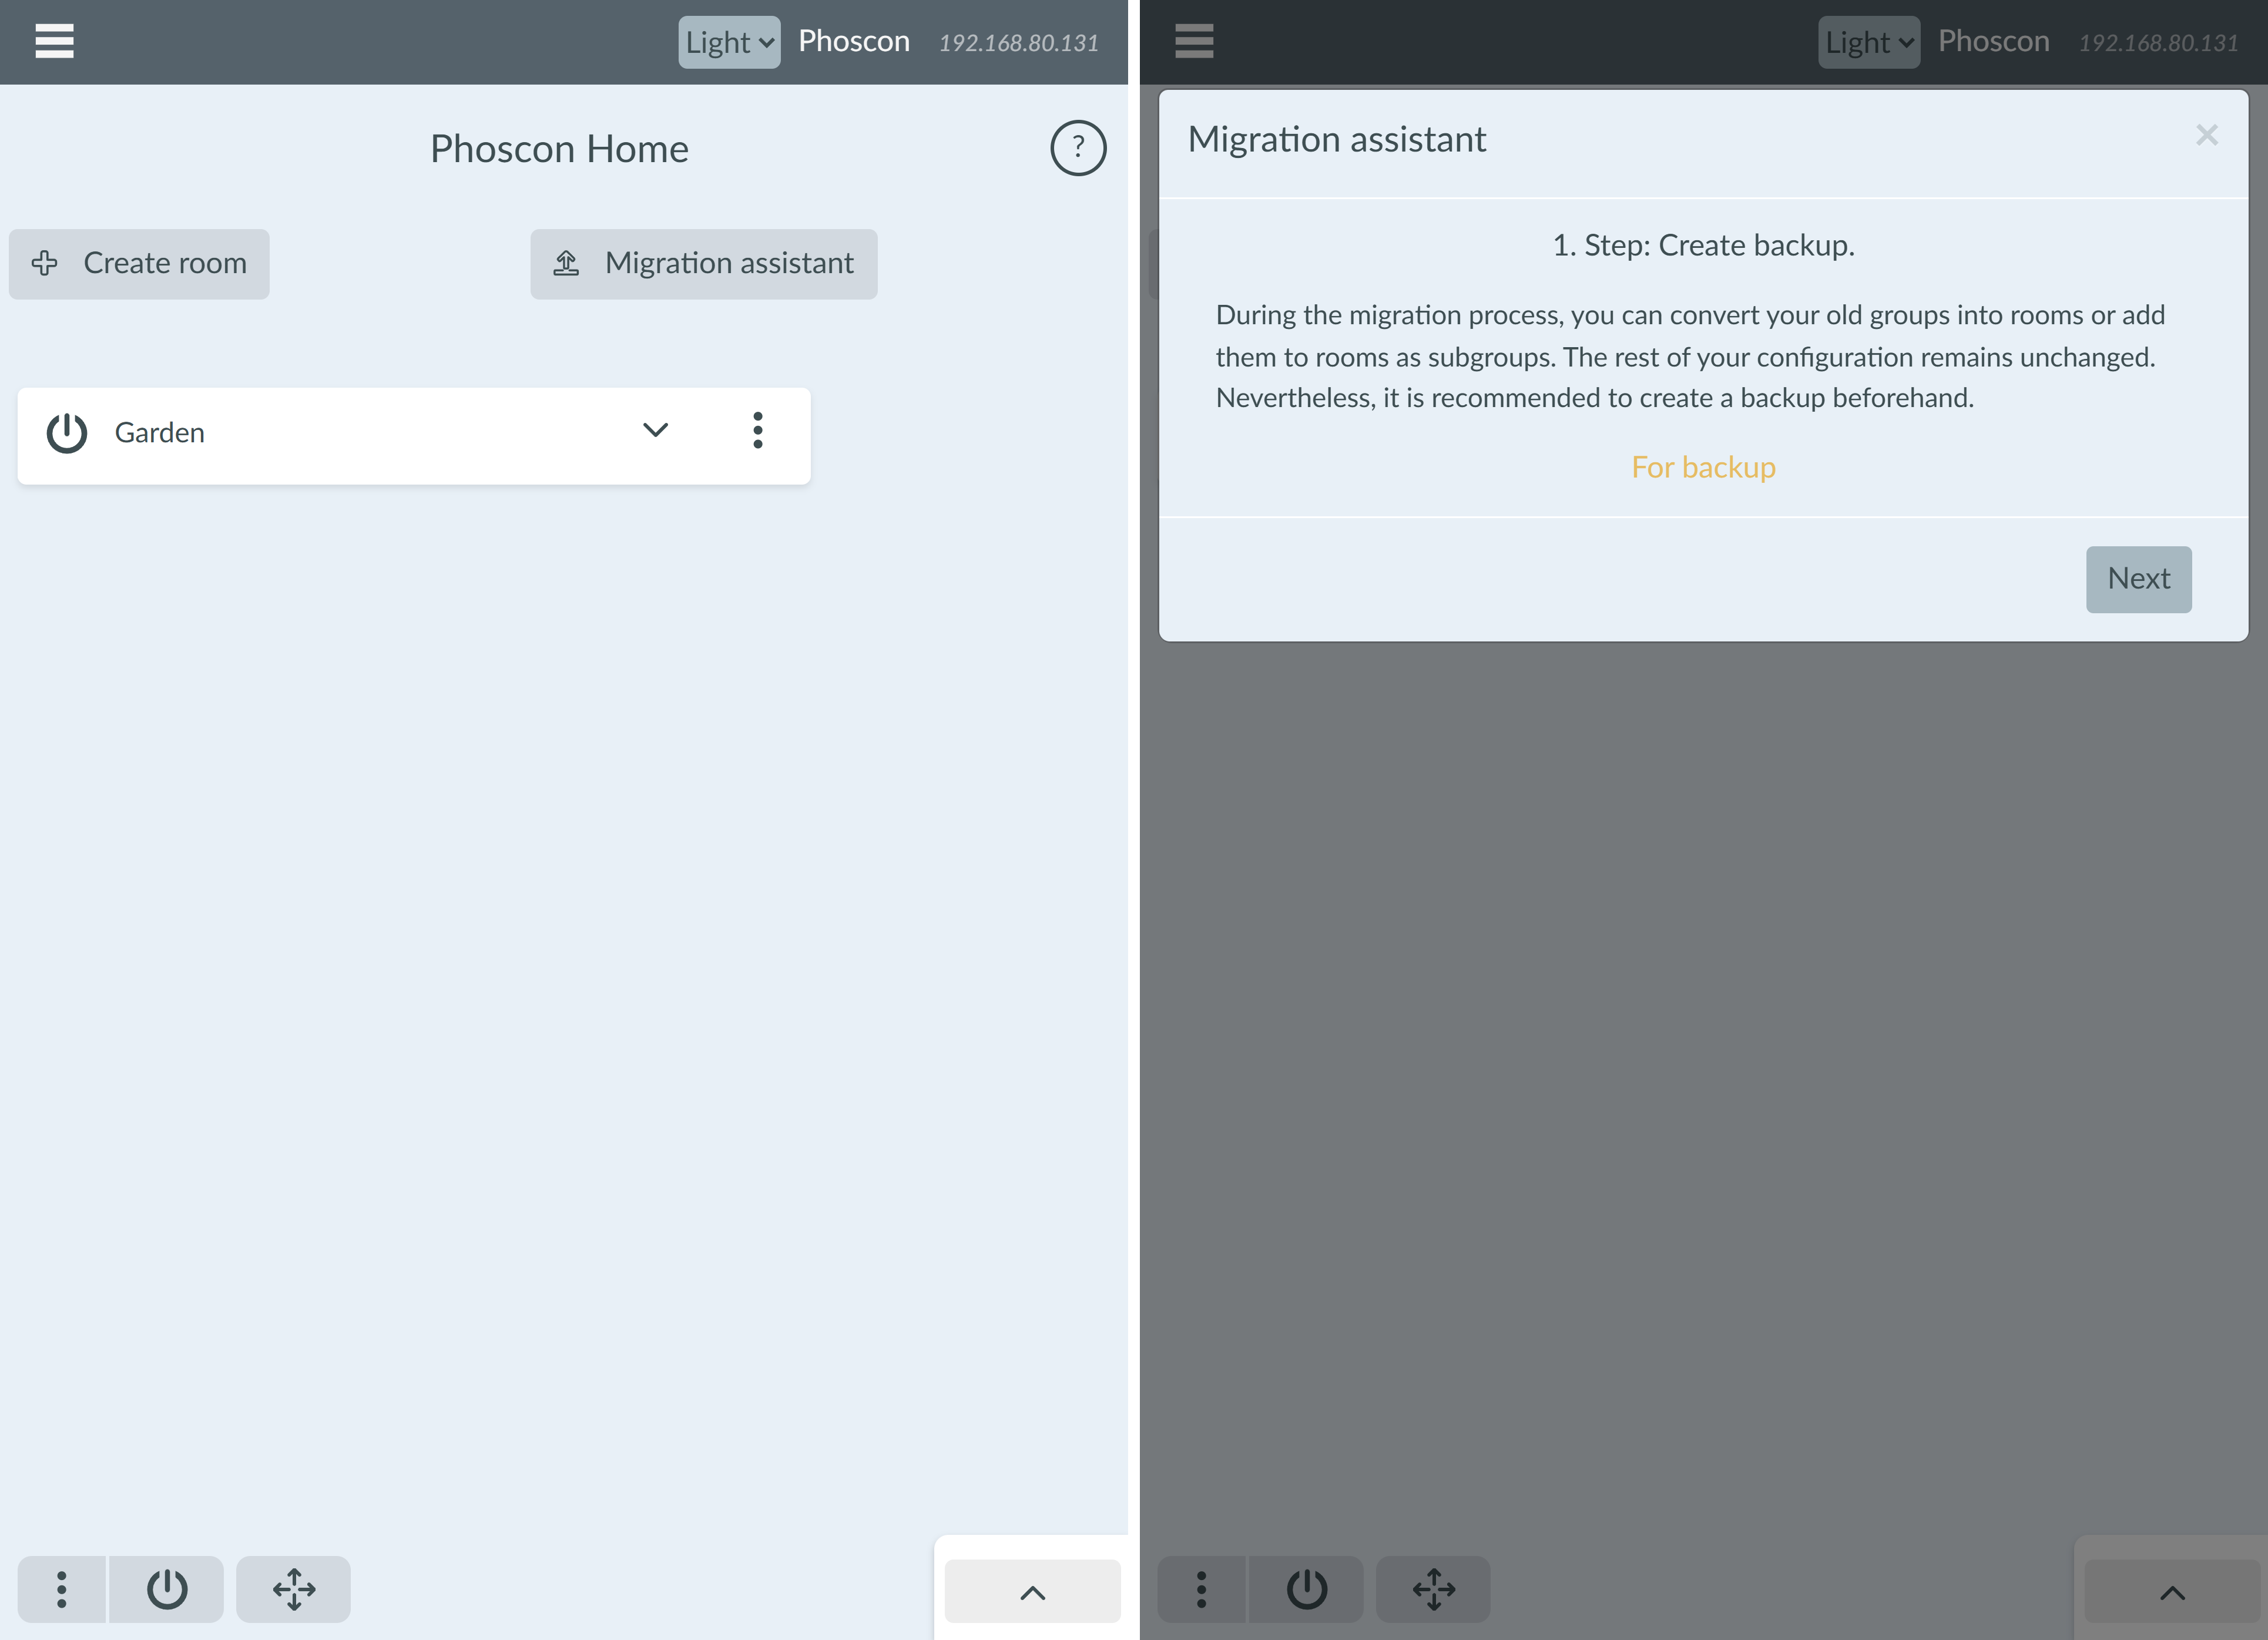
In the migration process you can convert your old groups to a room in Phoscon Home or add them as a sub group to an existing room. The steps are explained in the migration wizzard.
Note that the conversion is only made in the backend of the app. So nothing changes in the RestAPI and the backend of deCONZ. Your old Phoscon App setup of lights, scenes, schedules, automations, etc. will remain the same and will just be shown inside the rooms in the new dashboard.
However I strongly recommend that you create a backup of your existing setup before trying out the new dashboard and before starting the migration assistant. So you can easily revert back if something happens or you want to use the old app again.
The new start page:
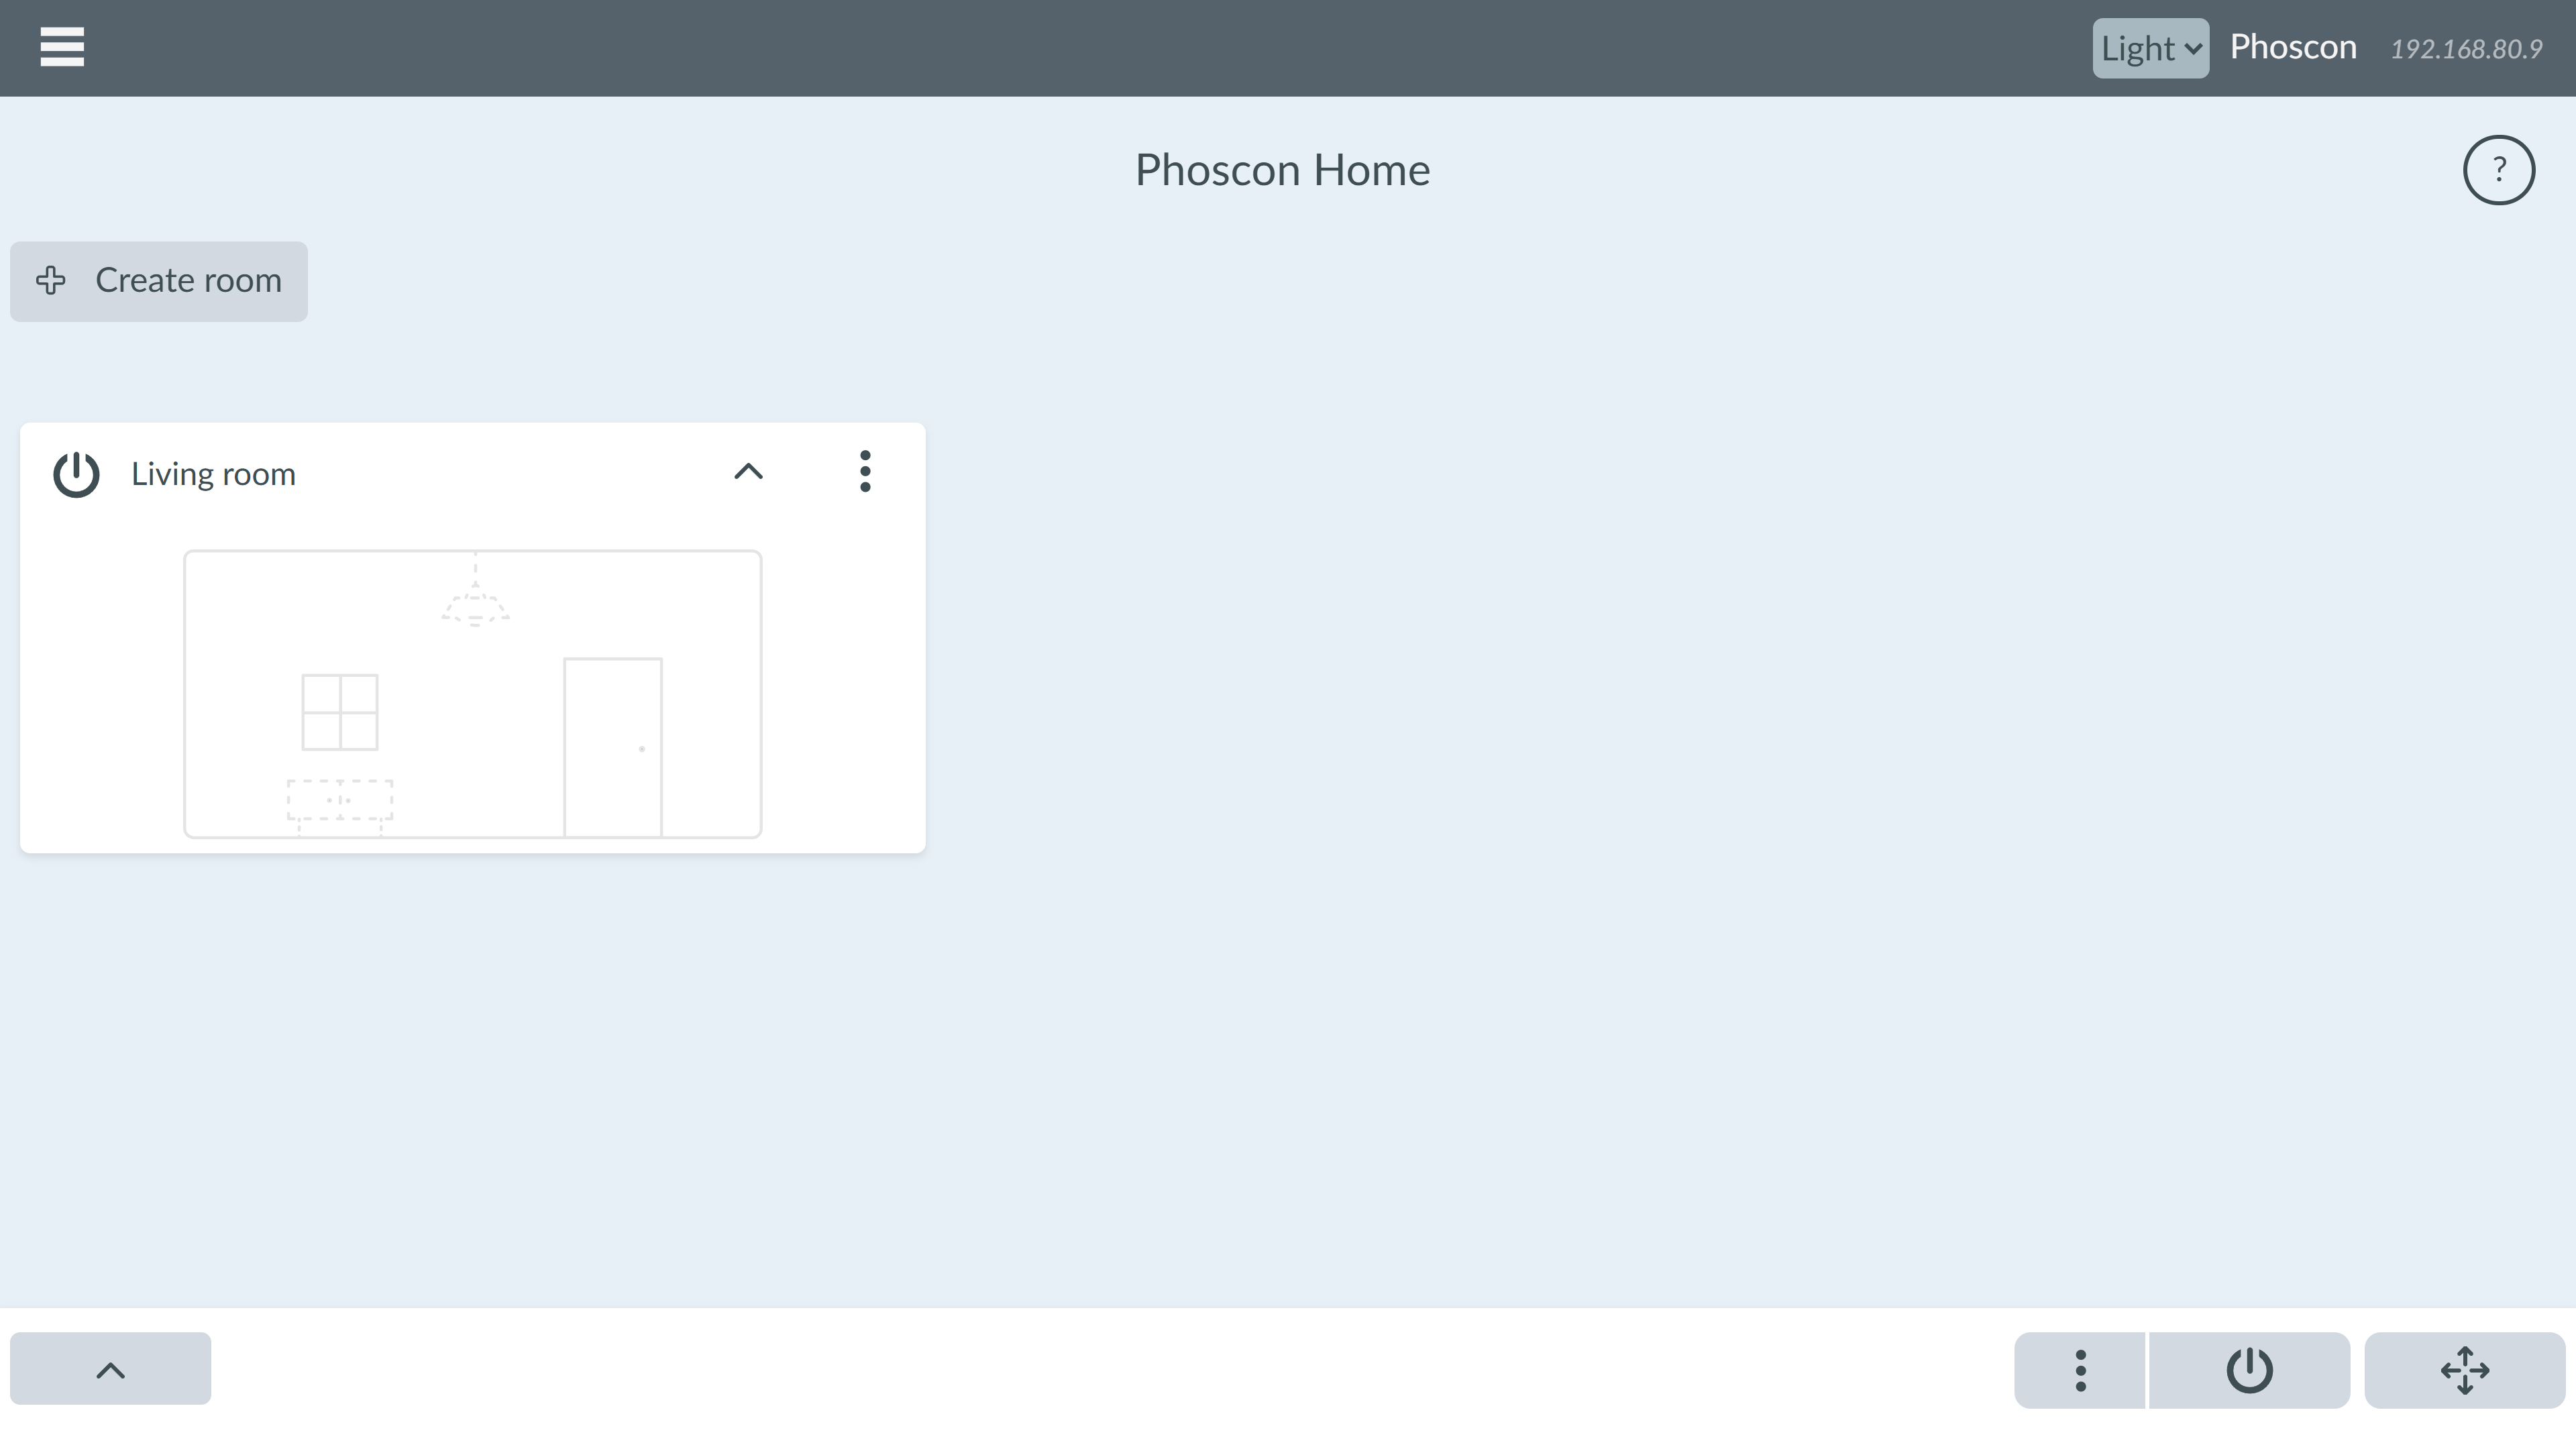
This is how the dashboard looks like when you have only one room and no other devices:
At the bottom of the page is the “quick device bar” you can expand or collapse it by pressing the ^ button. It will show all of the devices in your network:
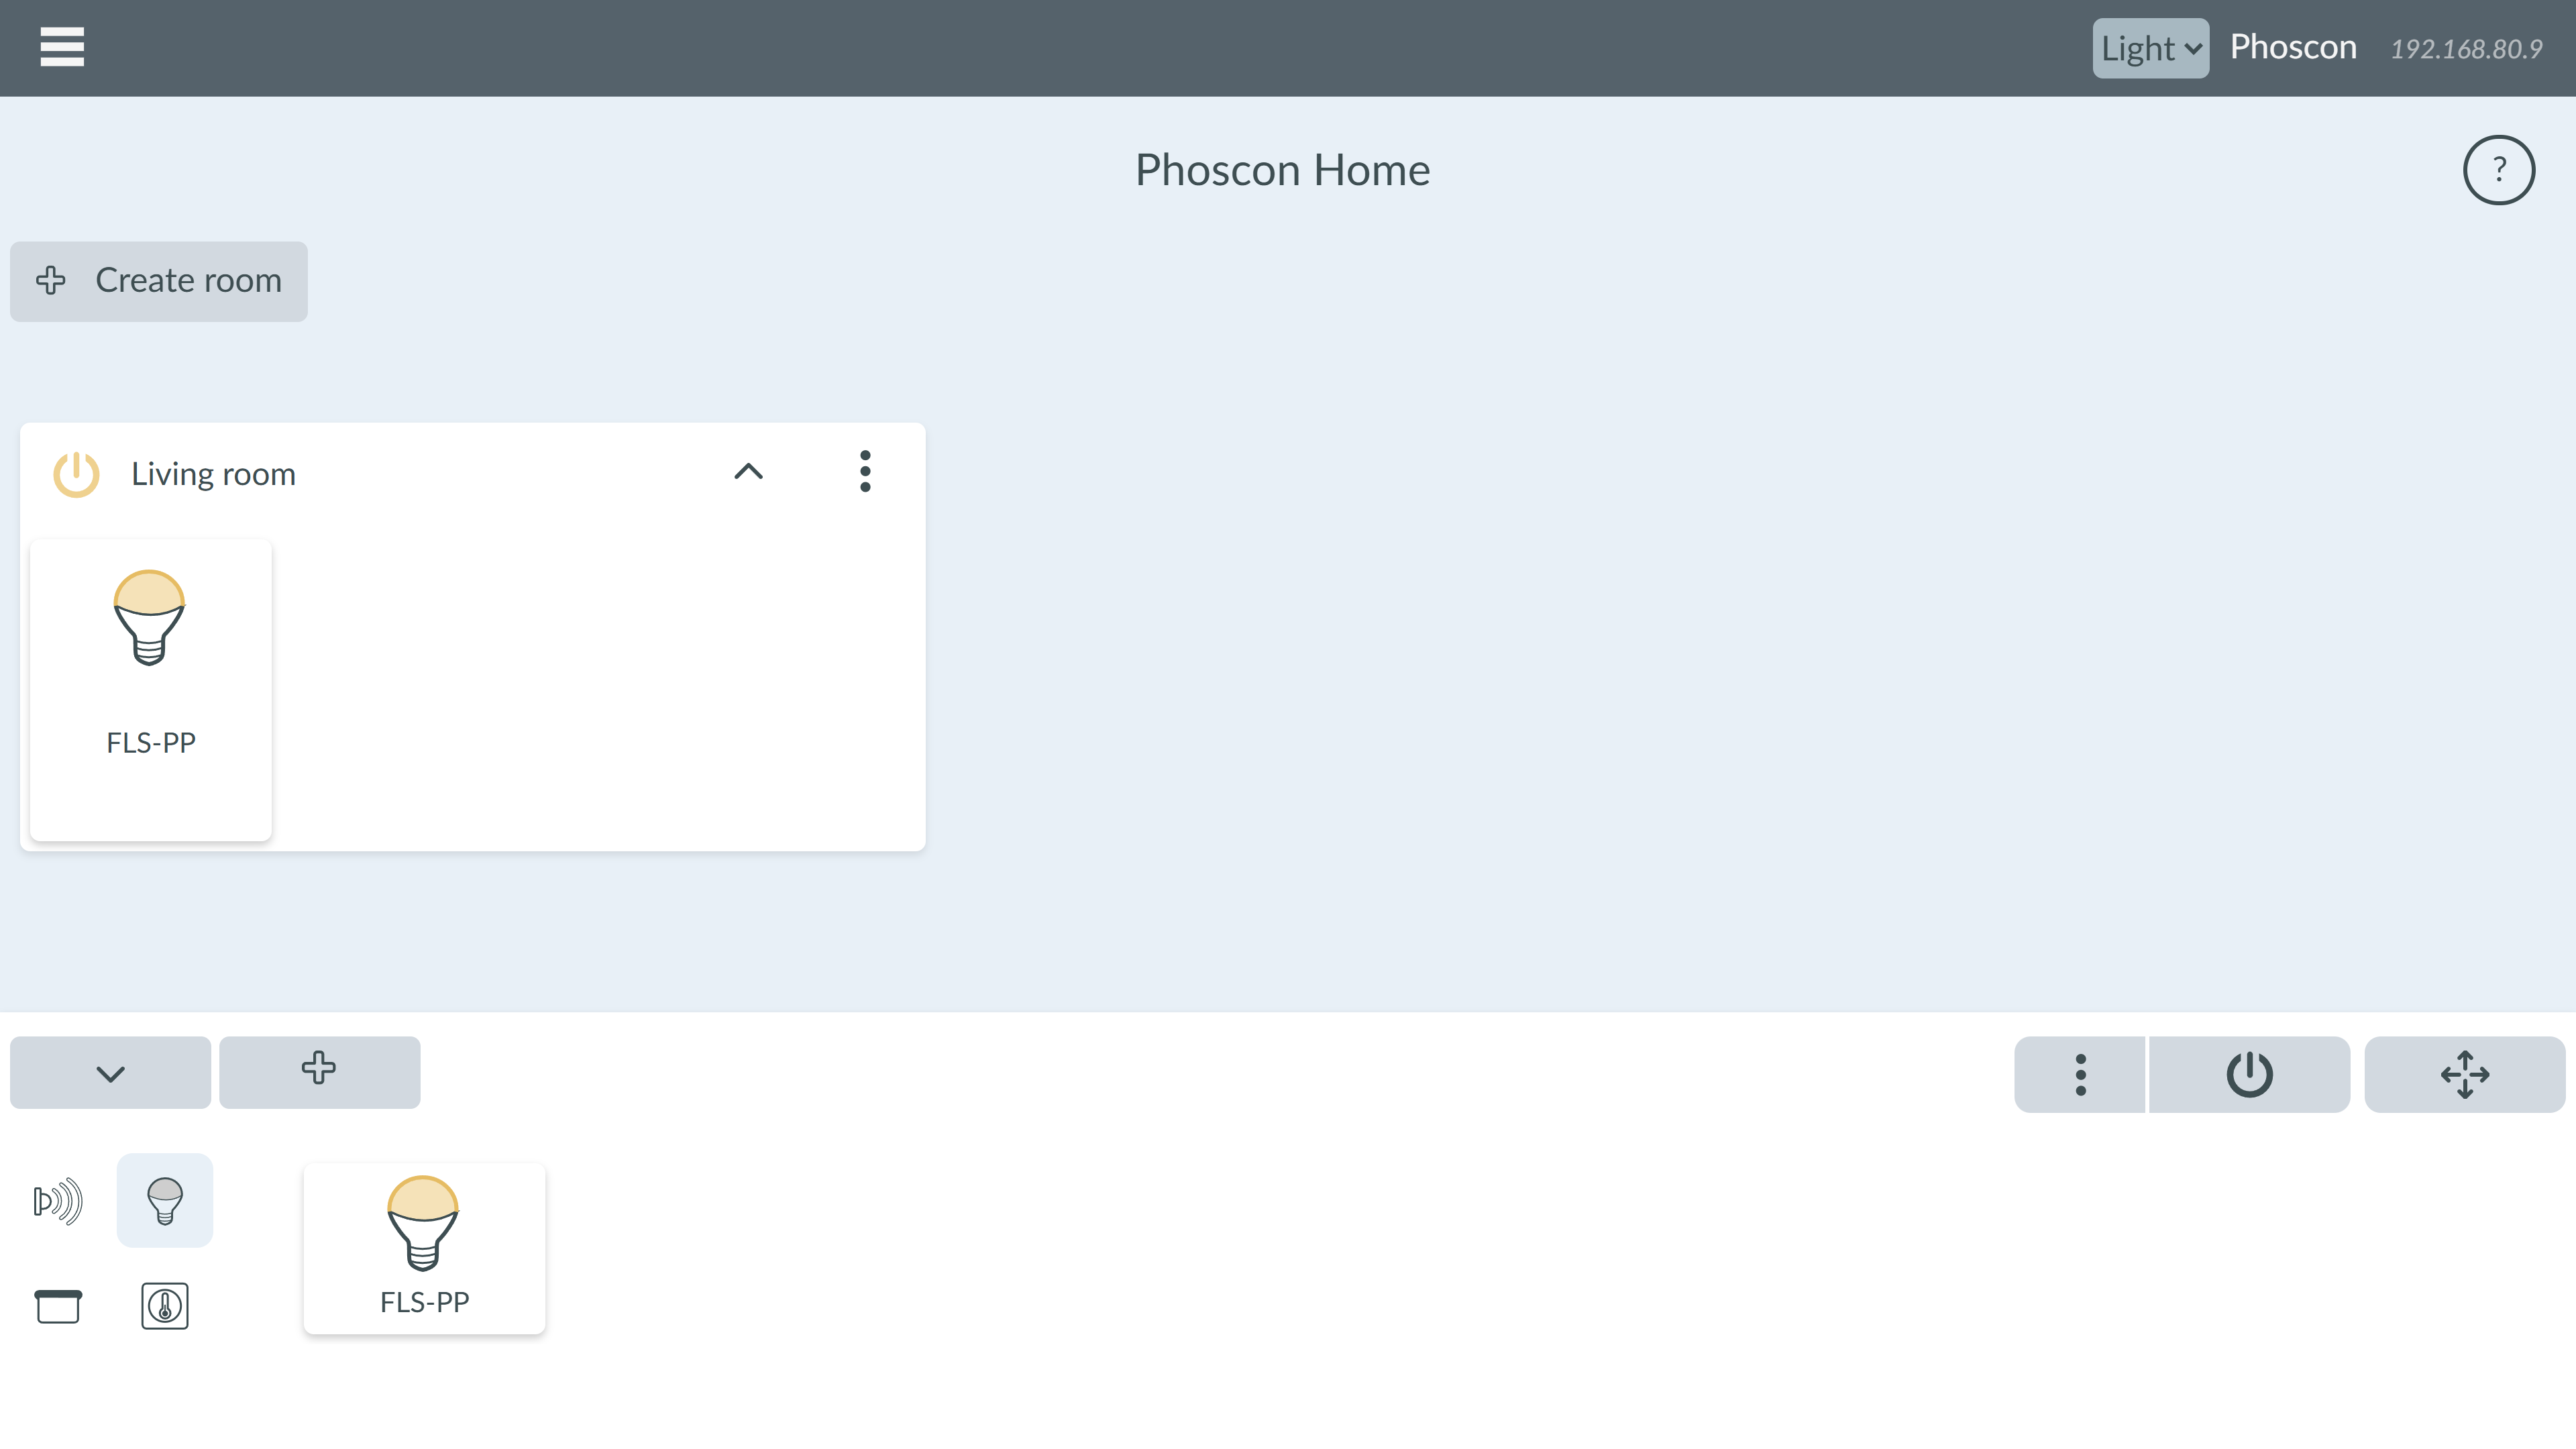
You can open your network and start a search for new device when clicking at the + button. Your devices are shown in four device tabs that you can toggle with the buttons on the left side: sensors, lights & plugs (in one tab), blinds and thermostats. You can always drag & drop devices out of the quick device bar into a room. You can only have one physical device in one room at the same time, so they are removed from a room automatically when you add it to another room. Devices can not be deleted from the quickbar.
This is how a more populated home looks like:
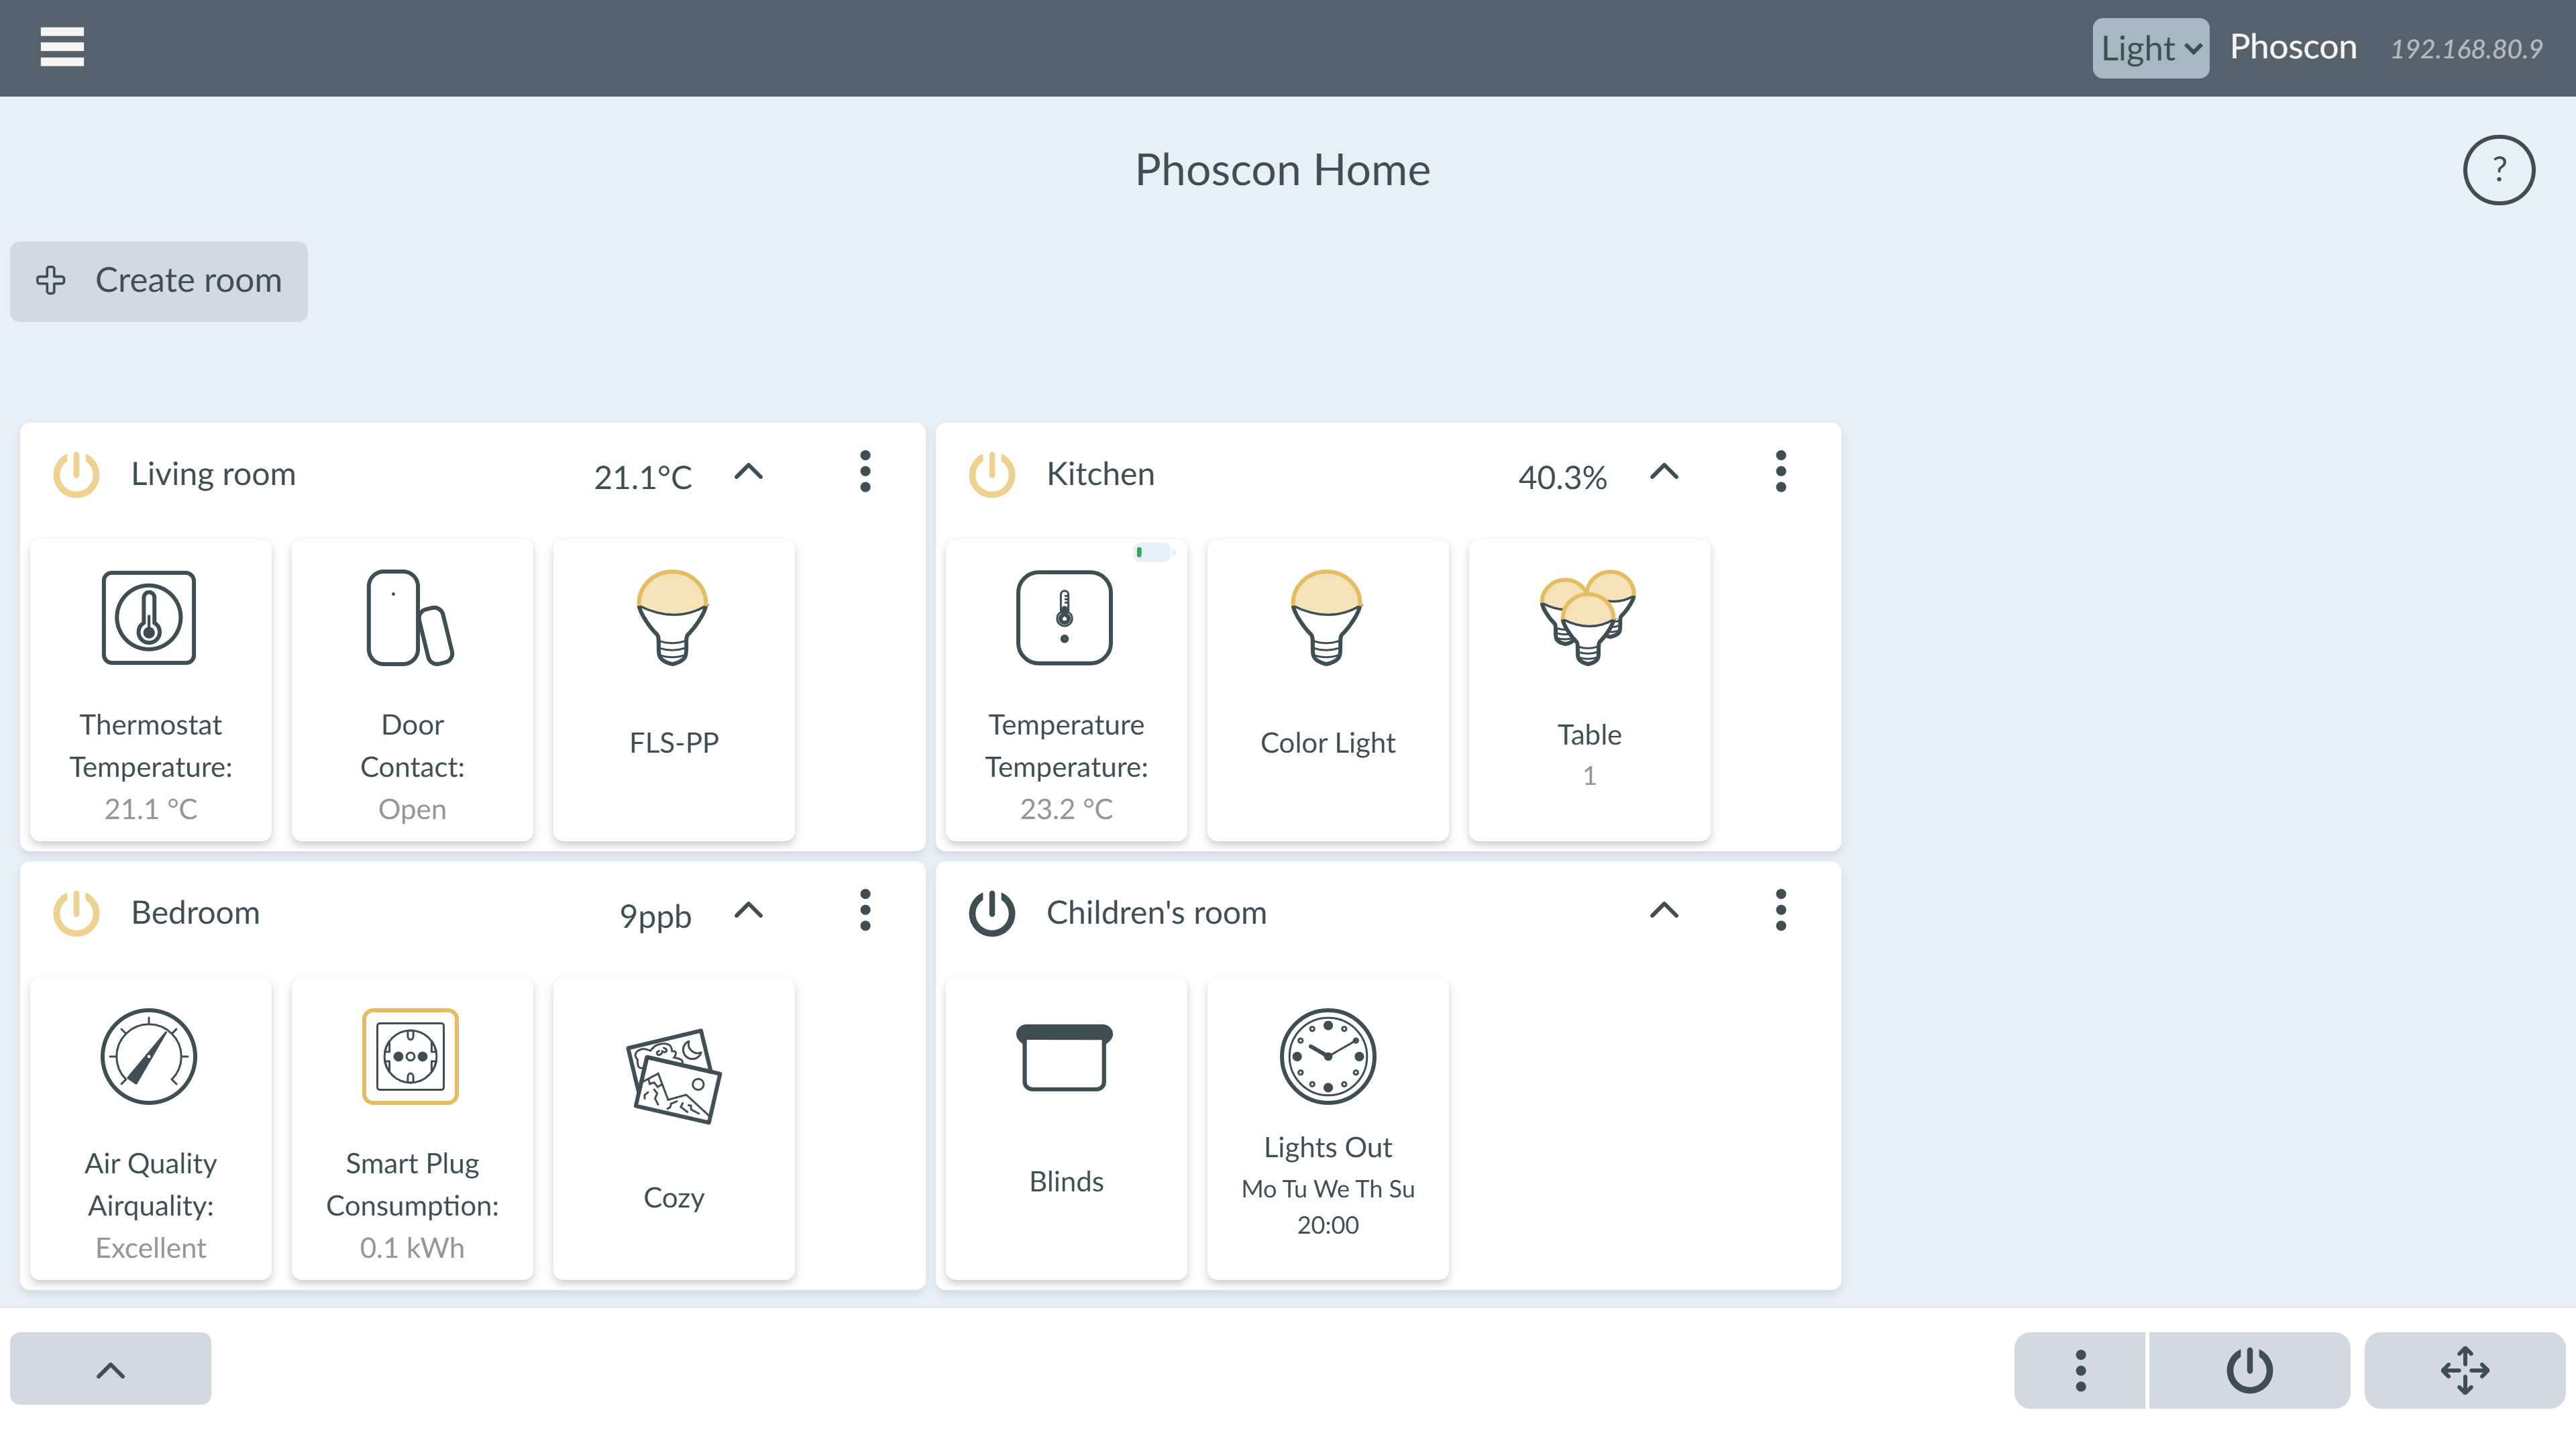
The most important funcions and controls of the dashboard:
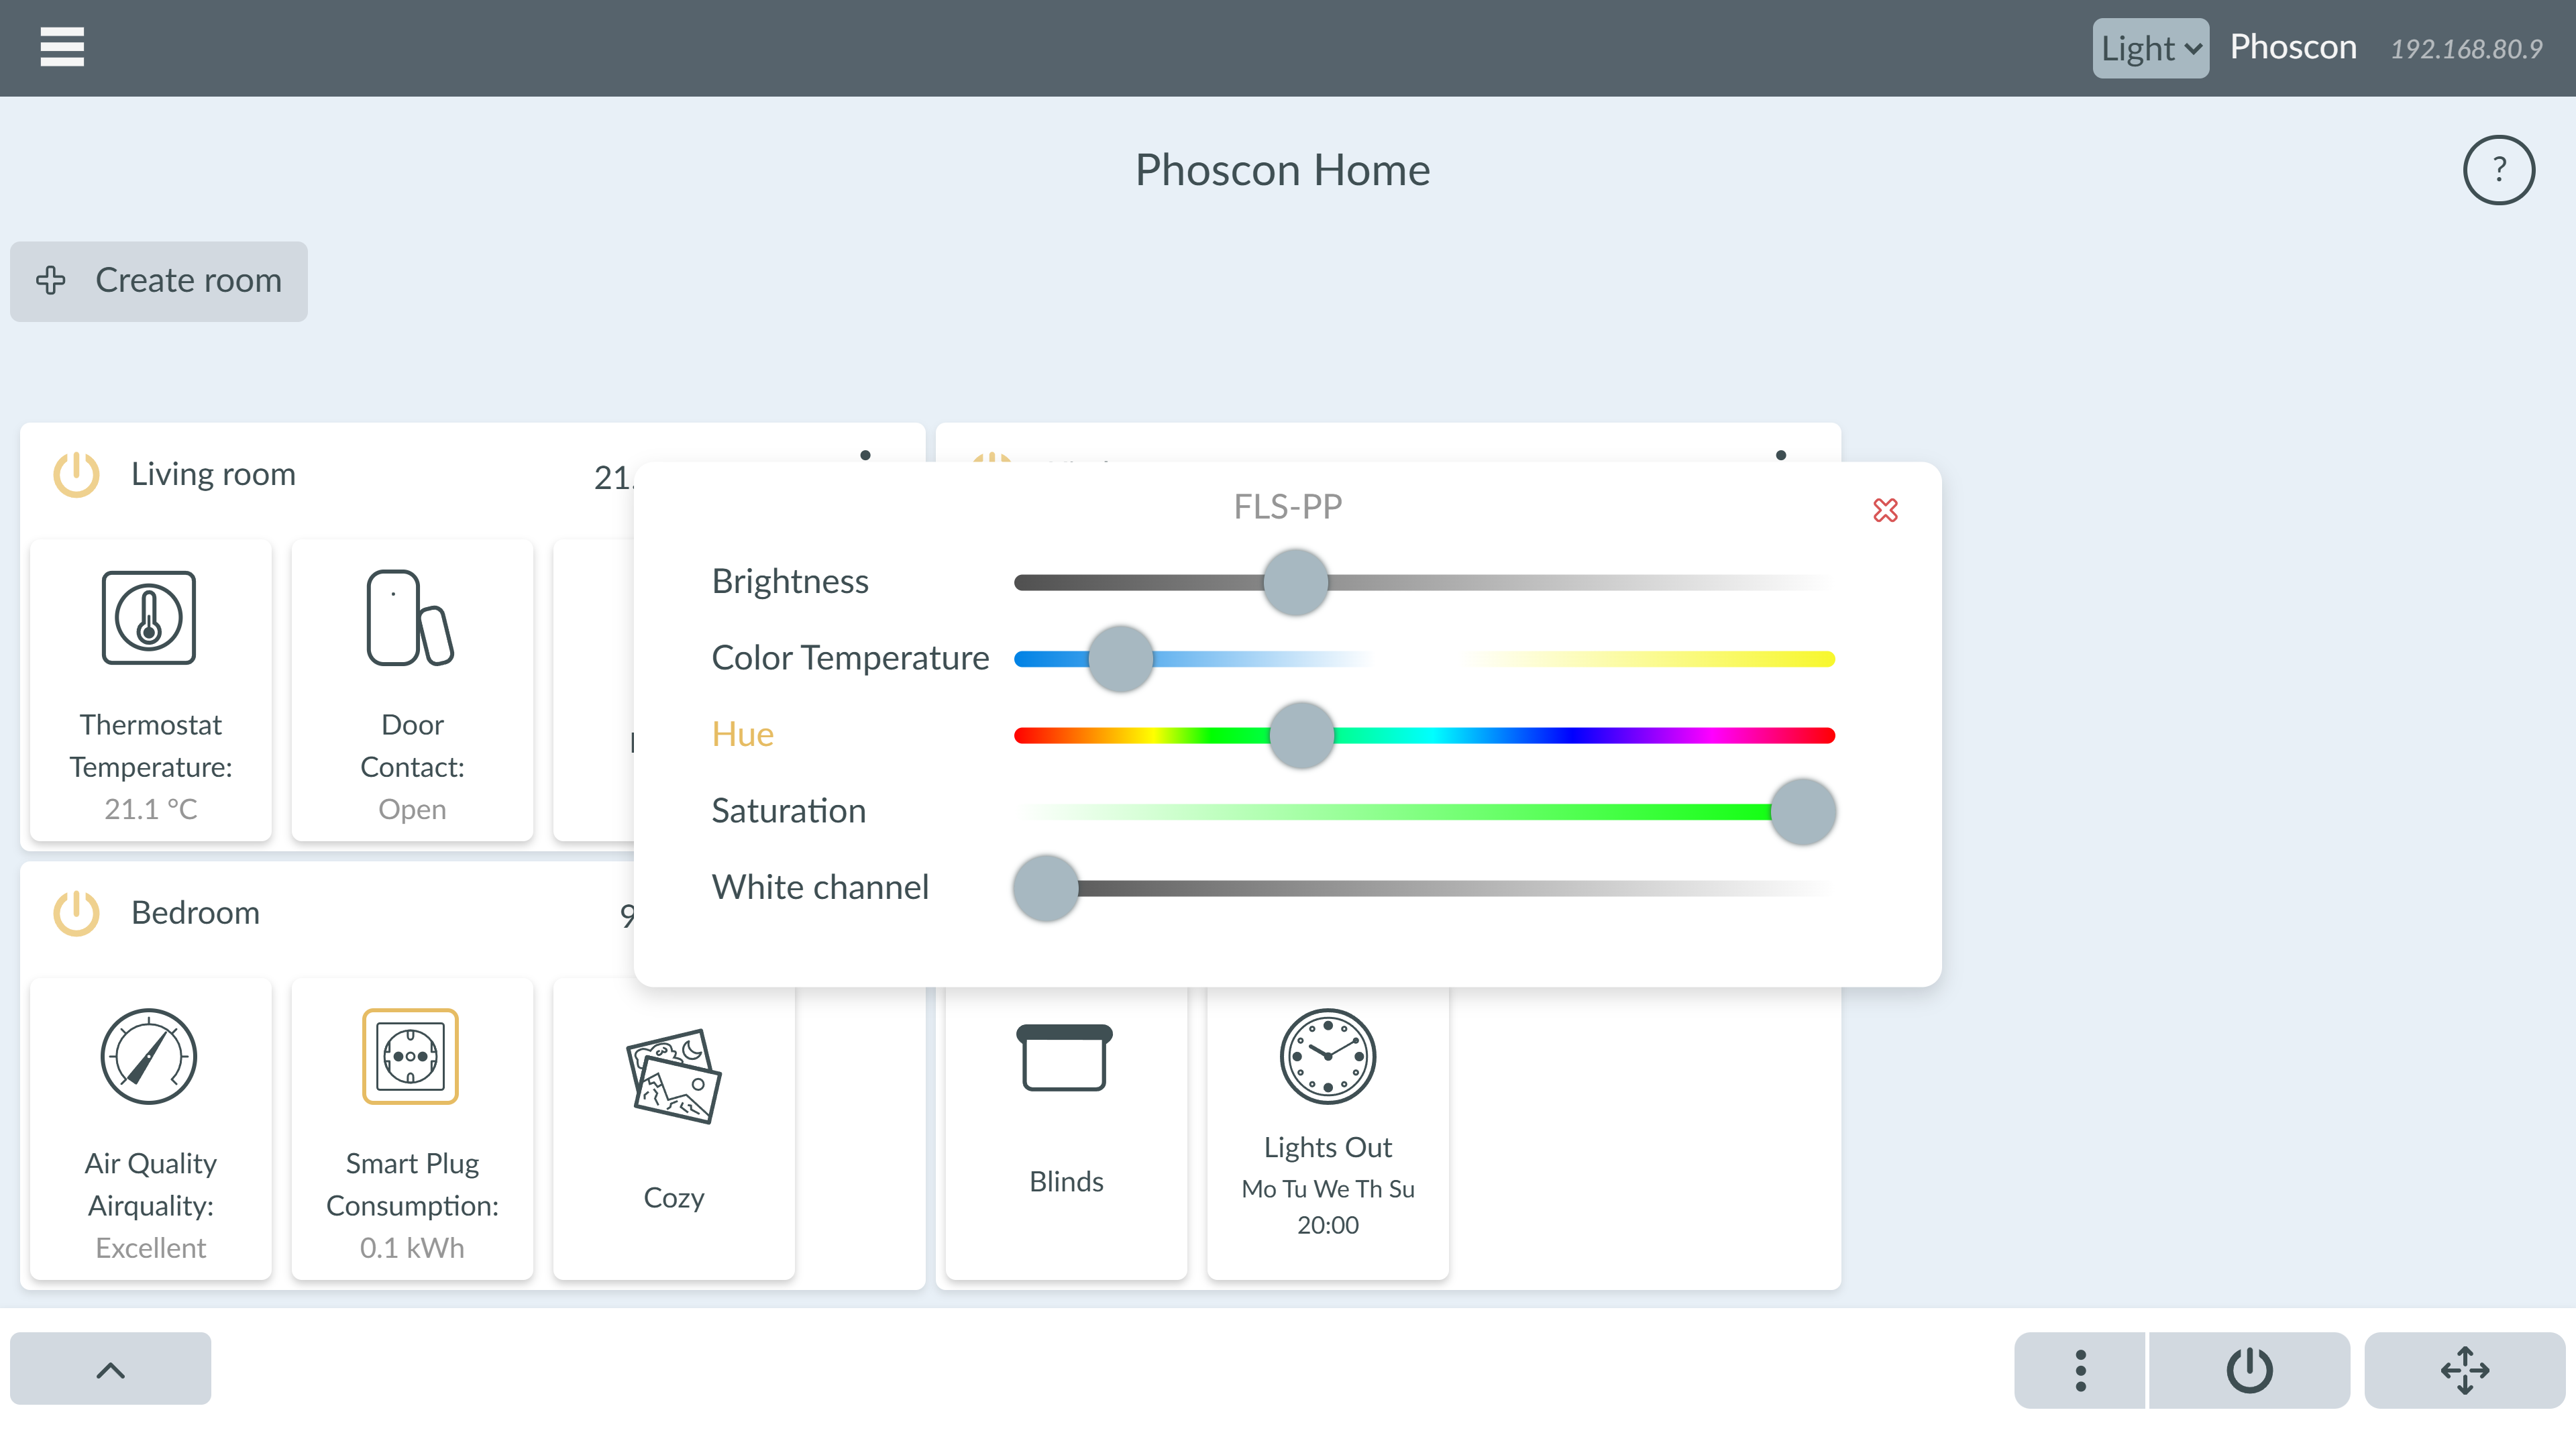
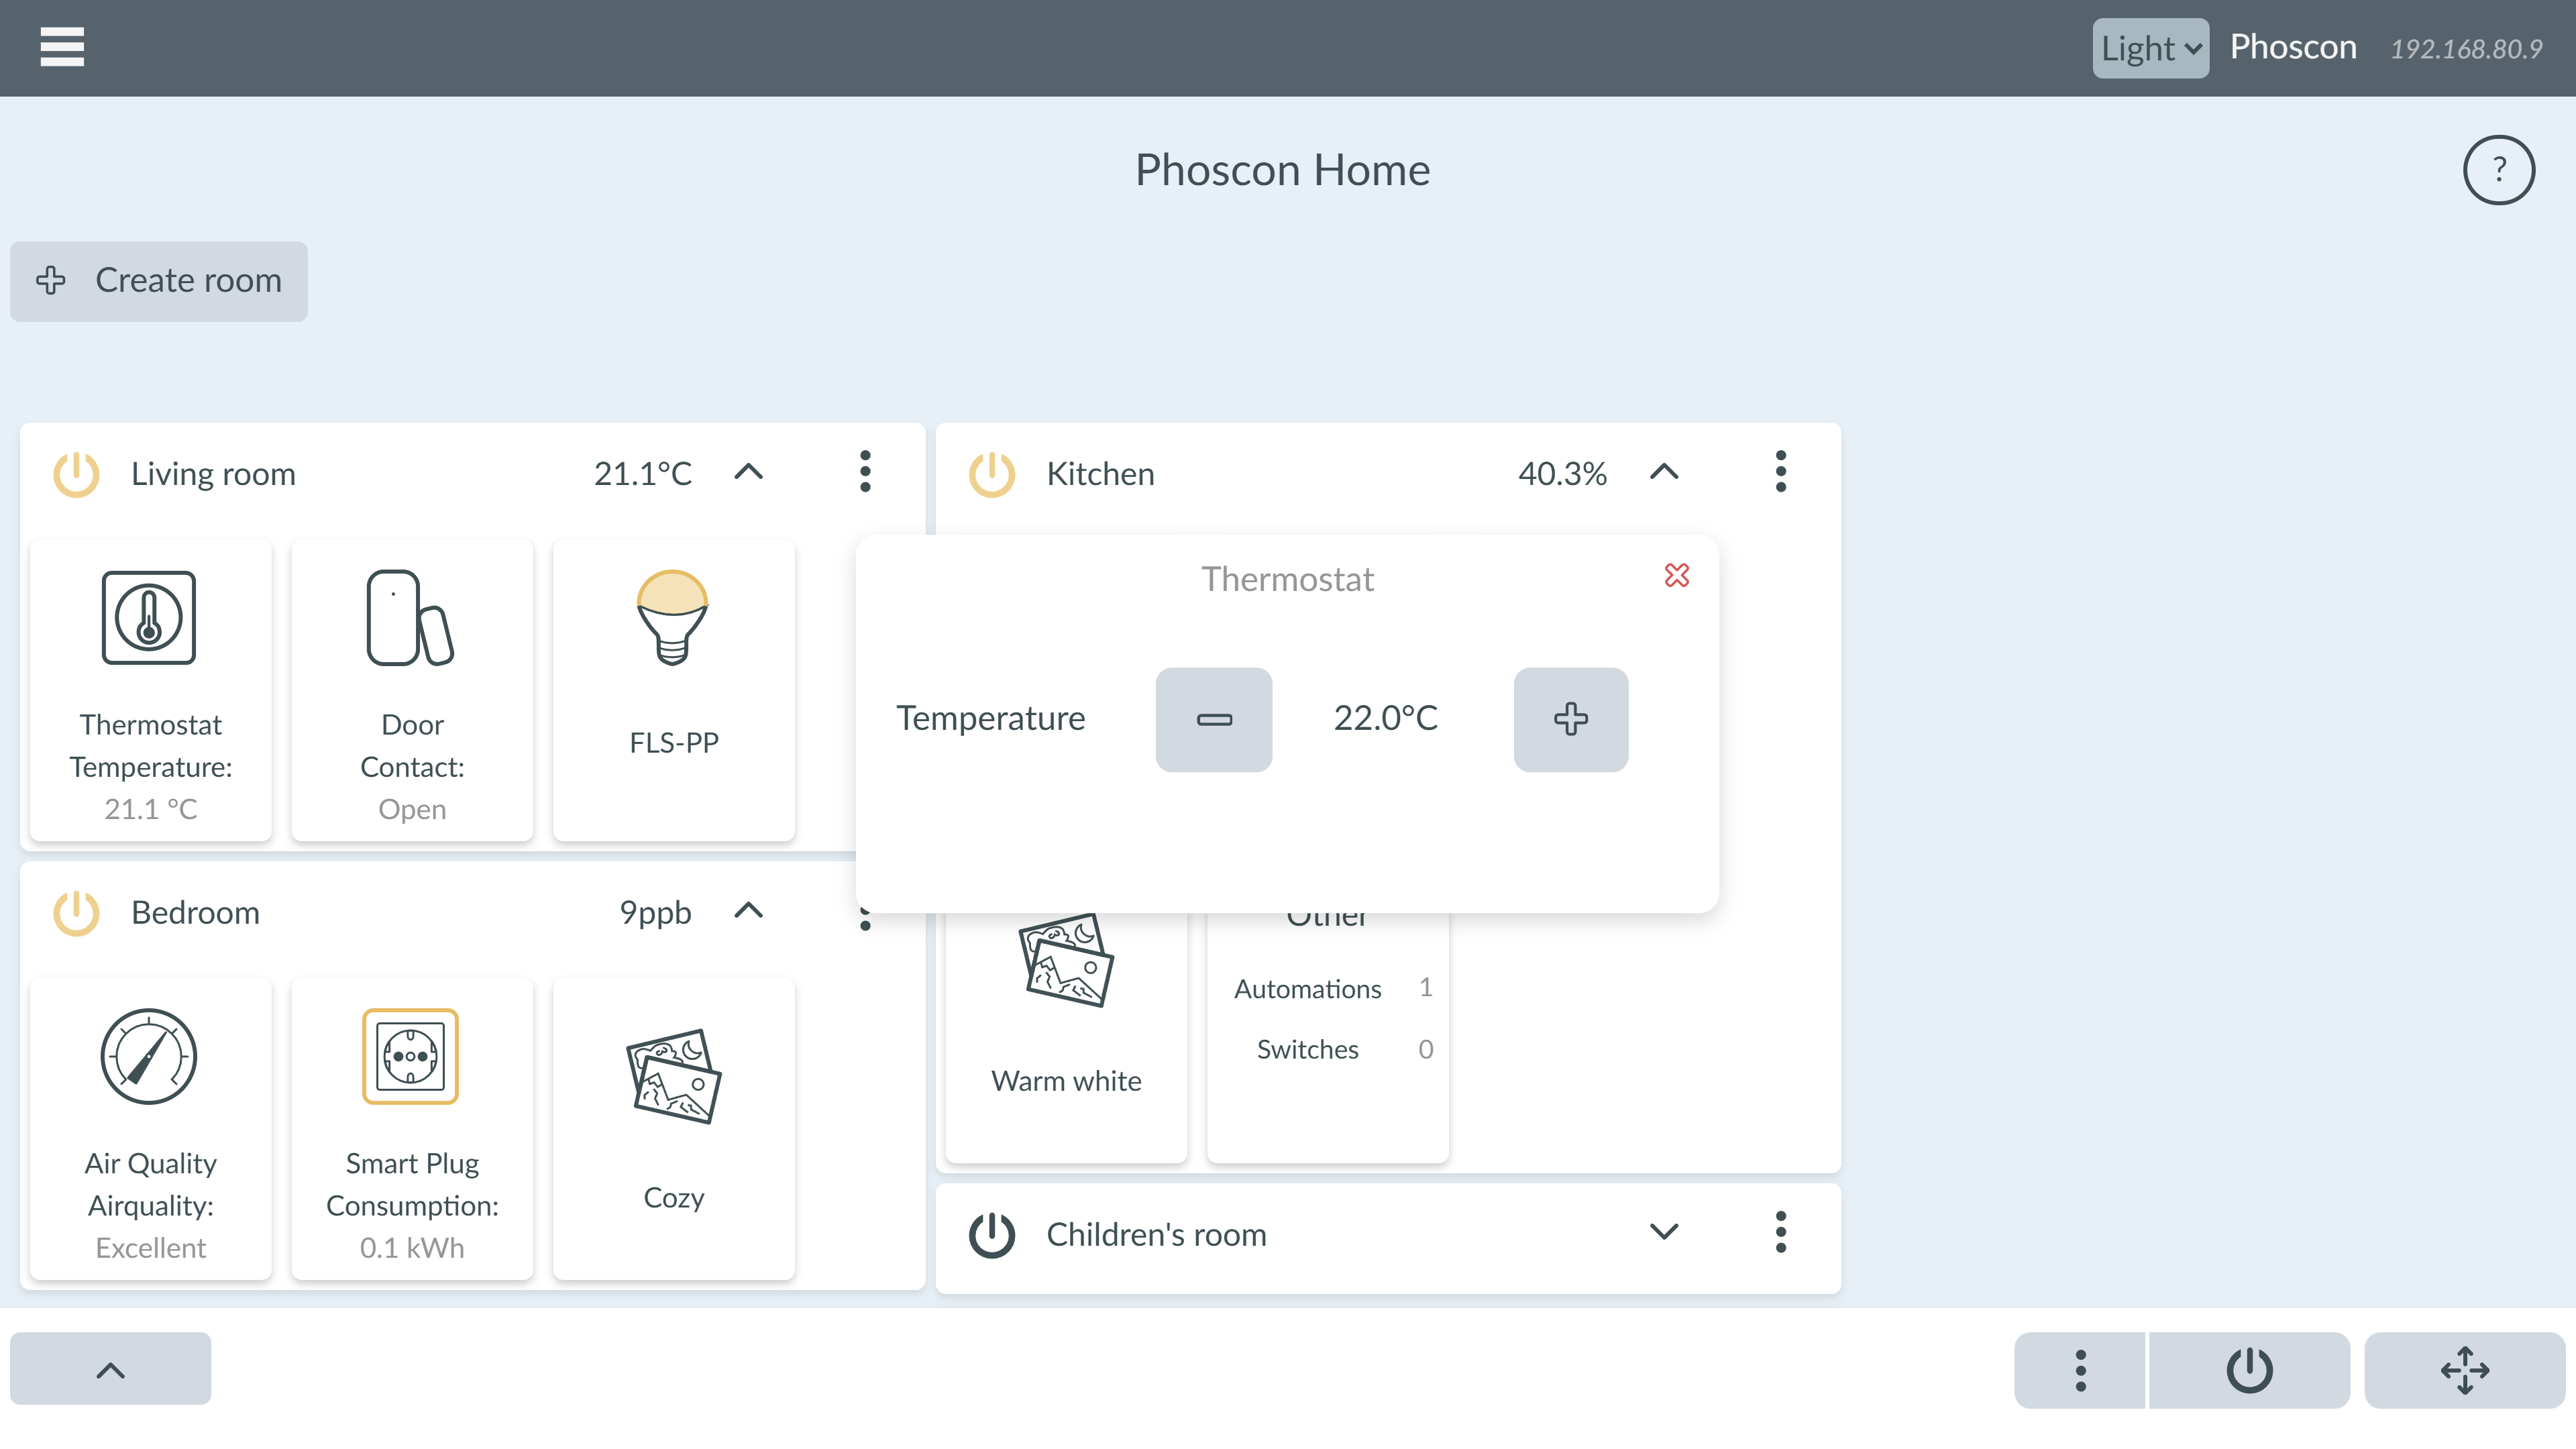
- You can click a device at the top half (the icon) to control it: on/off, set temp, set blind height, call a scene, toggle a schedule on/off. Press and hold the button to open light sliders.
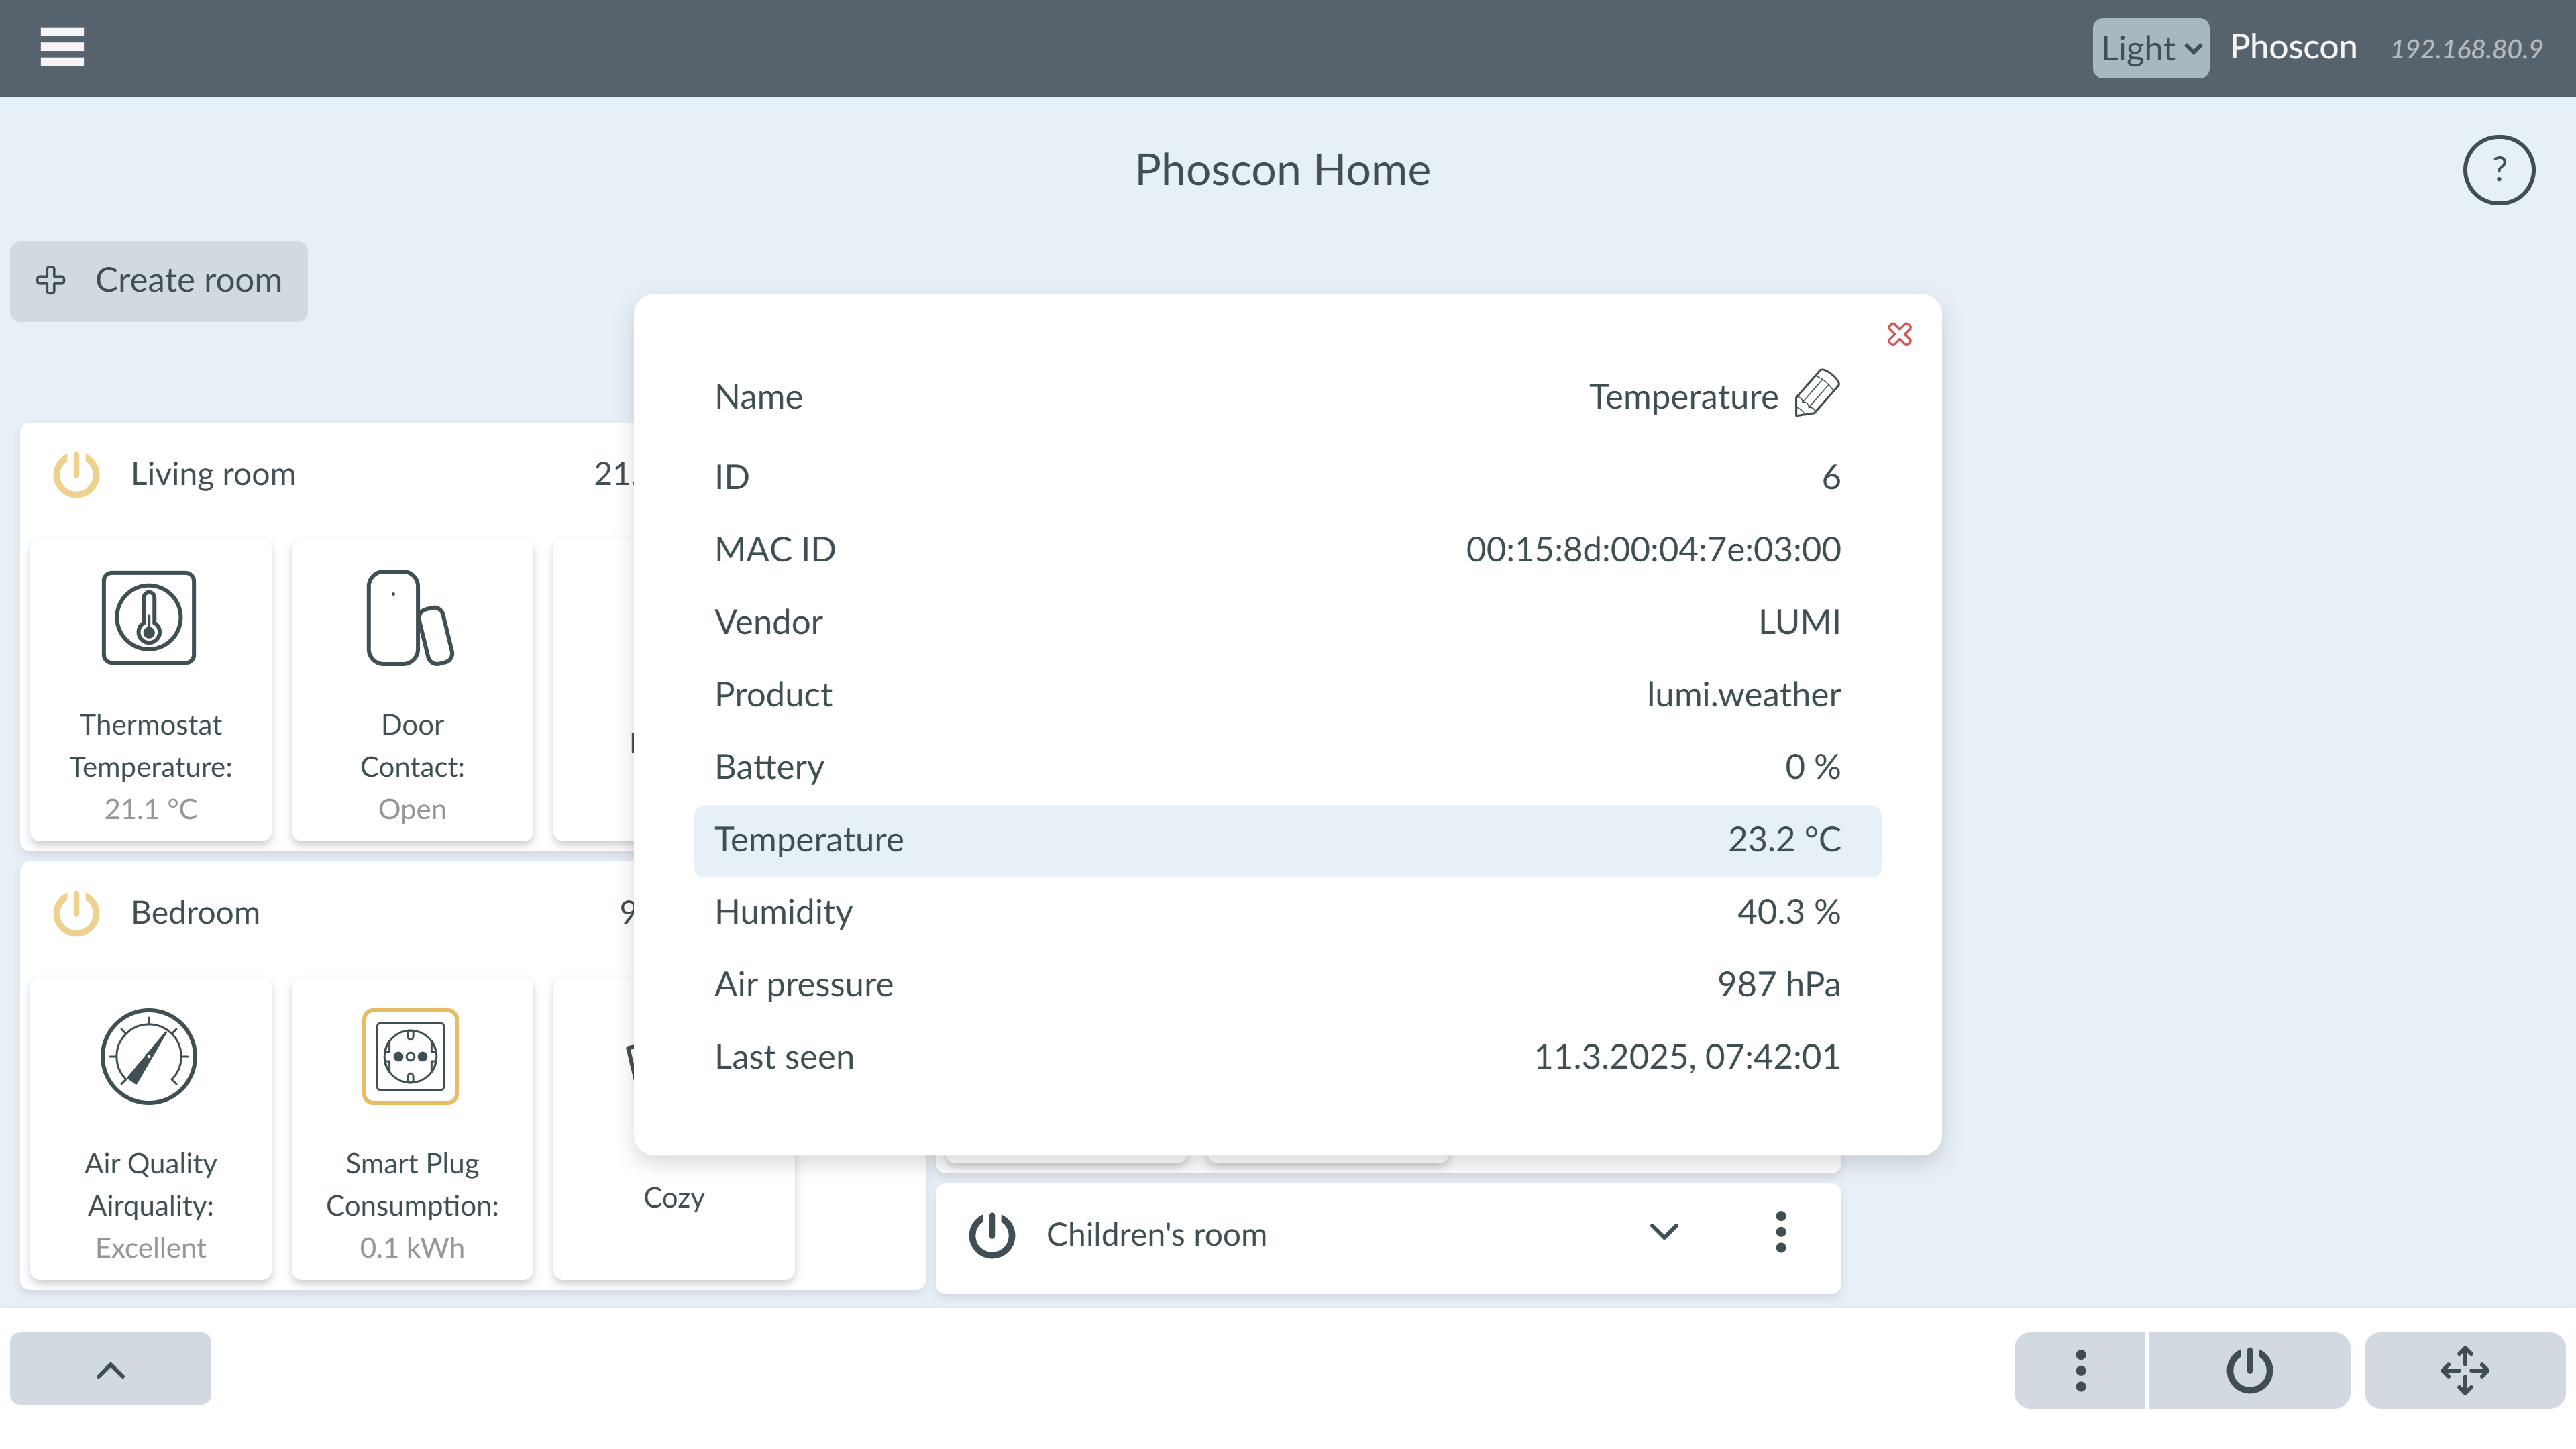
- You can click the bottom half (the text) of a device to show more information of the device and sensor values.
- For sensor devices the whole click area opens the device informations. You can select a sensor value that should be shown on the device item by clicking at it.
- a click on the name of a scene or schedule will bring you directly to the scenes/ schedule editor.
- The on/off button of a room toggles all lights of the room on and off. Initially only lights toggle on and off but not plugs to prevent that you accidentally switch your TV off. but you can add or remove lights and plugs to the toggle switch via the 3 dots menu of the room.
- The same goes for the all off button at the right side of the quick device bar. The only difference is that this button just put off all lights in your home.
- The “arrow cross” button on the quick device bar lets you rearange your devices and rooms via drag and drop. Only devices can be moved inside a room or from one room to another or out of a room. Scenes, groups and other items can not be moved. When you are finished press the “arrow cross” button again to lock your devices.
- In the menu “Favourite sensor value” of a room you can chose a sensor value that will be displayed in the headline of the room.
- A click at the room name will bring you to the room details page
See examples:
The room details page:

At the room details page you see all items of the room and you can create new items there by clicking at the + symbols.
This includes: subgroups, devices (lights), scenes, schedules, automations, switches. The + button will bring you to the already known editor pages of the old Phoscon App. You can also add every of those items to a sub group by clicking at the “3 dot” menu of the sub group and then at the + button.
On this page drag & drop is disabled. You have to use the + buttons to add or remove items.
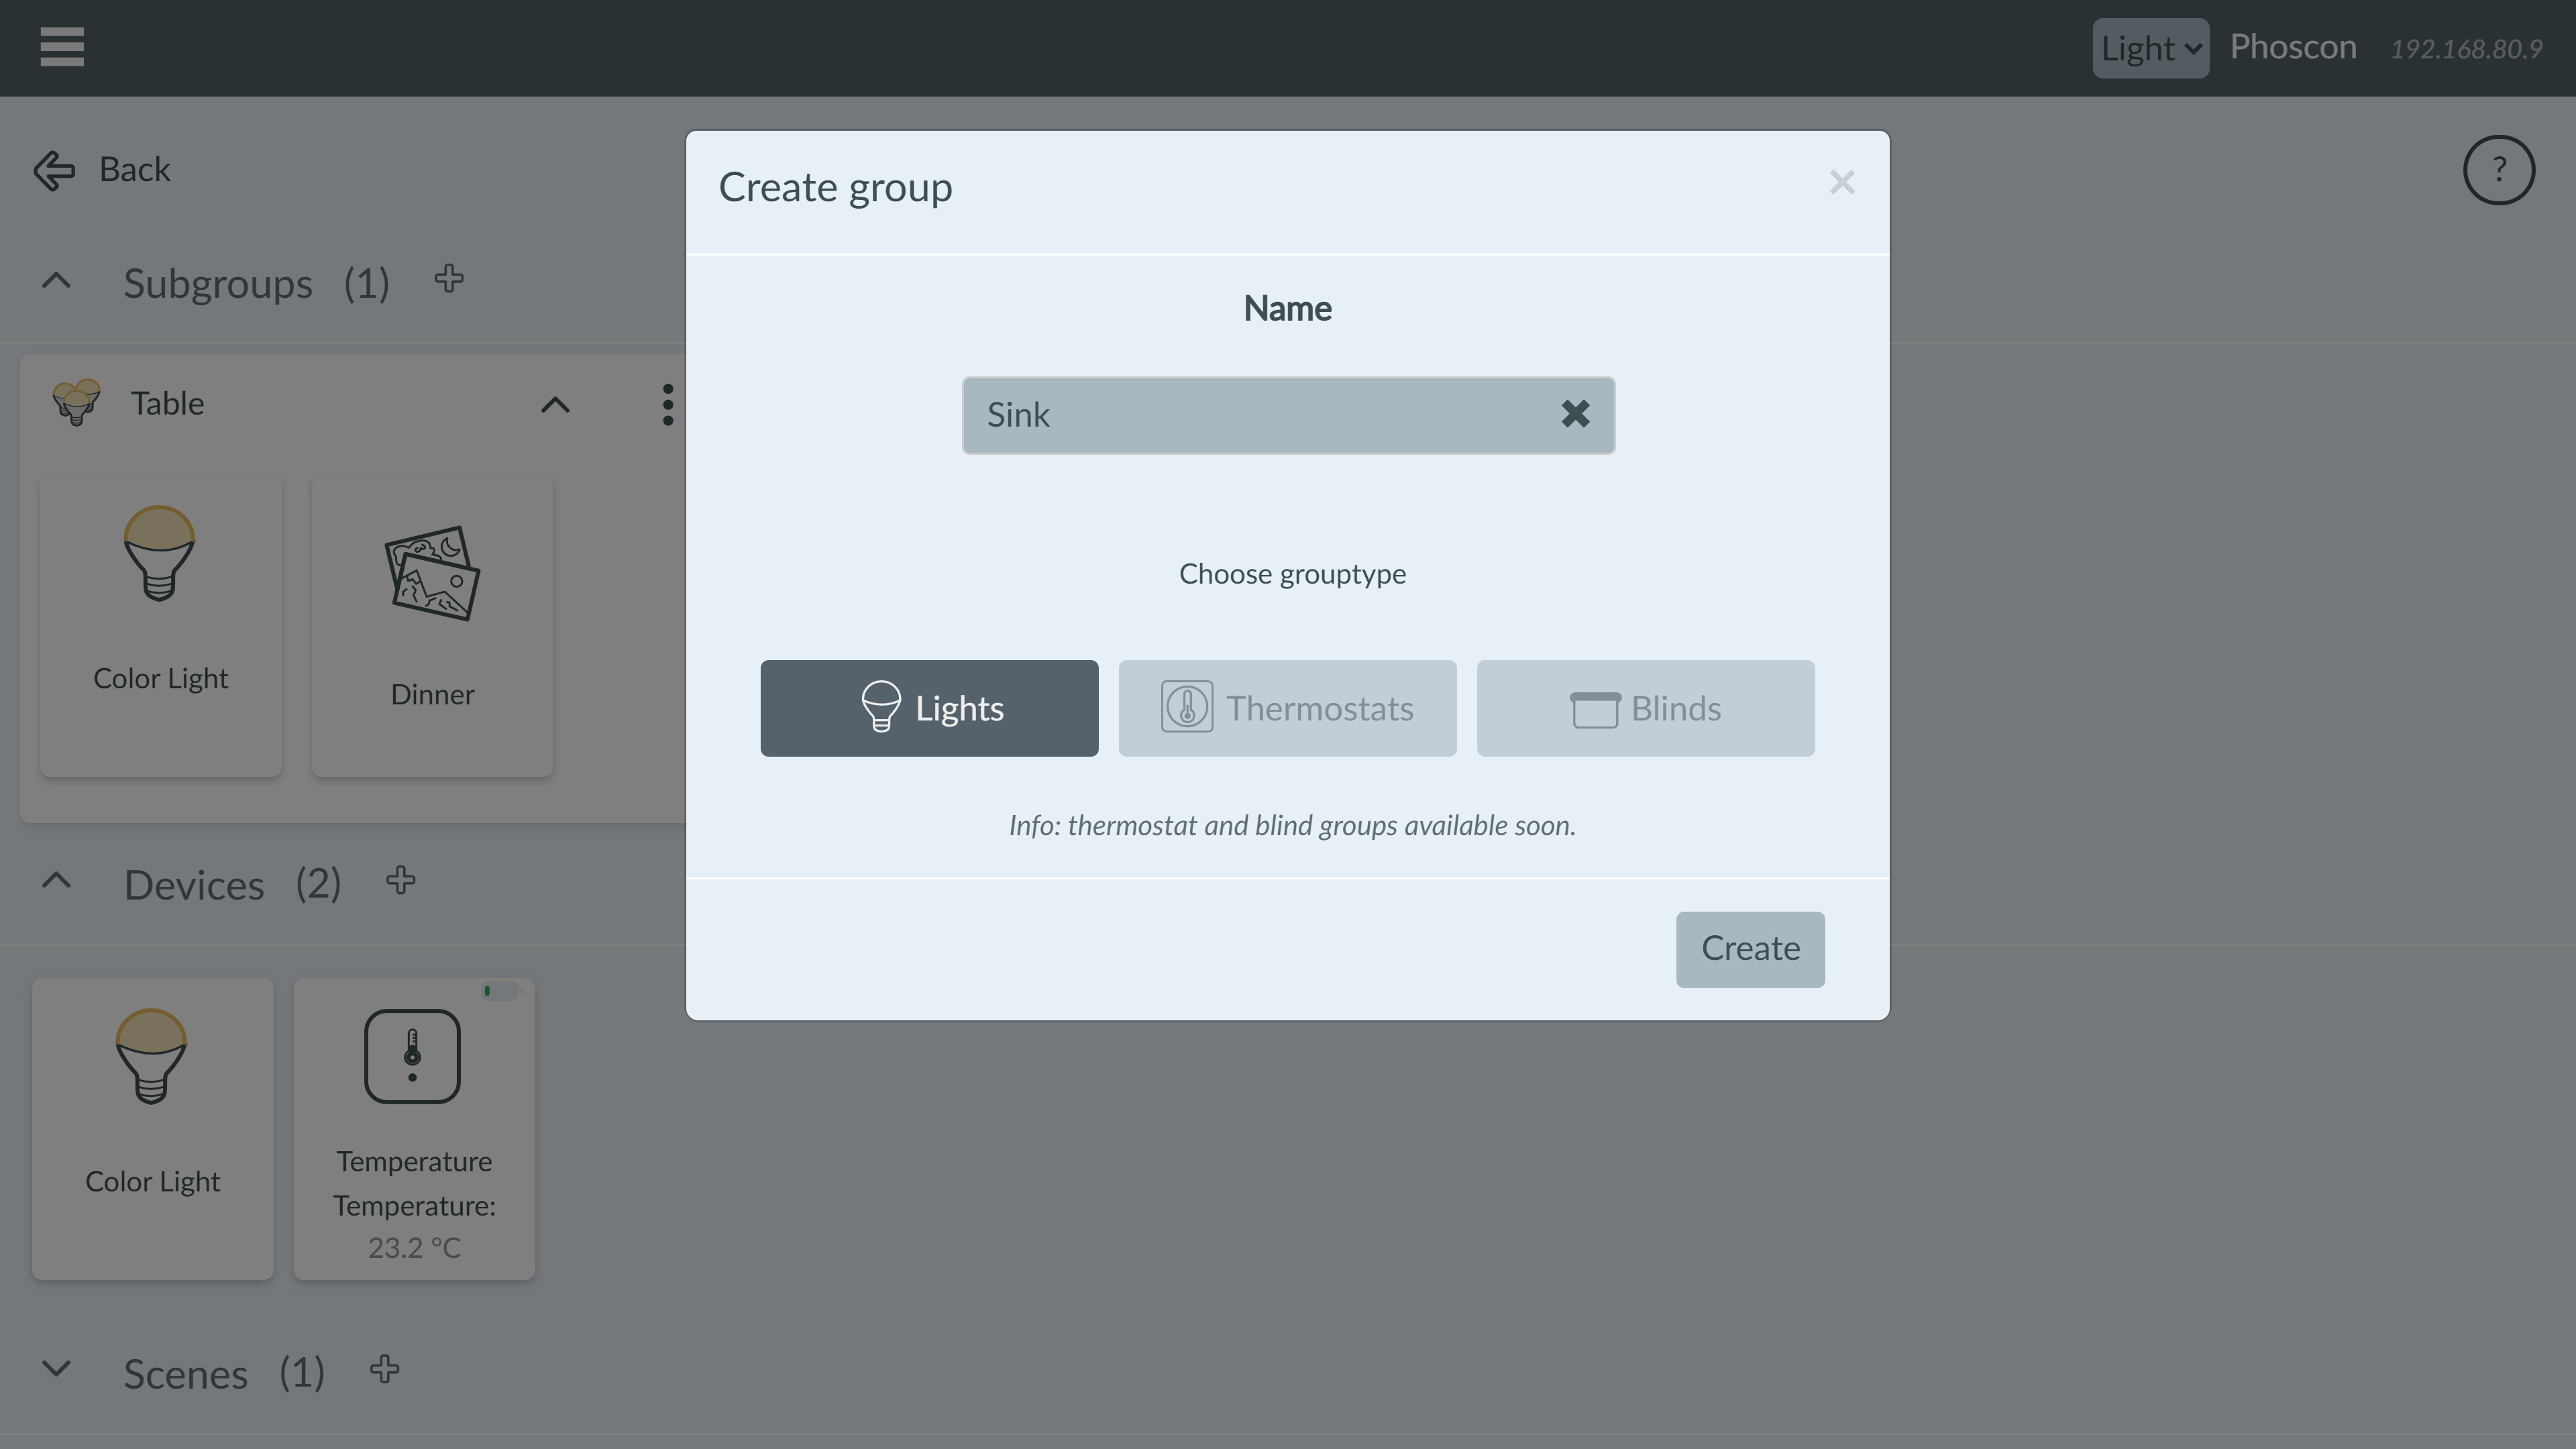
For now you can only create a sub group of type light. Later there will be the possibility to create thermostat and blind sub groups. And then there will be the possibility to create automations and schedules with thermostats and blinds:
Beta Test of Phoscon Home
You can download the latest version of the Phoscon Home Beta App with the dashboard from here:
https://deconz.dresden-elektronik.de/phoscon_app/
You have to extract the zip file to a directory and then you have to add the location of the extracted app folder to the link that start deCONZ.
On Windows:
- create a link to deCONZ.exe somwhere
- right click at the link and go to preferences
- in the target field, after deCONZ.exe add --auto-connect=1 (if it is not there already just for auto connect of your ConBee device)
- then add
--http-root="D:\Projects\Phoscon\pwa\"Just change the drive letter and directory to the directory where you have extracted the zip file. Let there be a space between deCONZ.exe and the--parameter.
On Raspberry Pi:
- change the deconz-gui.service file or deconz.service (for headless deconz)
- location: /lib/systemd/system
- add the
--http-rootparameter afterExecStart=/usr/bin/deCONZ - example:
ExecStart=/usr/bin/deCONZ --http-port=80 --http-root="/home/pi/path/to/pwa" - change the path to the extracted pwa directory
- When you edit the service file itself the changes will apply until your next update of deCONZ. When you want a persistent solution you have to use
sudo systemctl edit deconz-gui - Add this to the file:
### Editing /etc/systemd/system/deconz-gui.service.d/override.conf
### Anything between here and the comment below will become the new contents of>

[Service]
ExecStart=
ExecStart=/usr/bin/deCONZ --http-port=80 --http-root="/home/pi/path/to/pwa"

### Lines below this comment will be discarded
- then
sudo systemctl daemon-reload - then
sudo systemctl restart deconz-gui
And don’t forget to create a backup of your Phoscon App first.
Feedback
Please add feedback and/or bug reports related to the new dashboard to this thread.